Anyway, since I did not get to share the joy there...I am sharing it here...with YOU! Y'all are my favorite people to share sewing stuff with anyway!!!!
Looking back at the pattern from two years ago that I submitted I think I have improved on the original. I have gone back into the photo archives and have found many more photos to share for the sewers, like me, that need that good visual to help it all make sense.
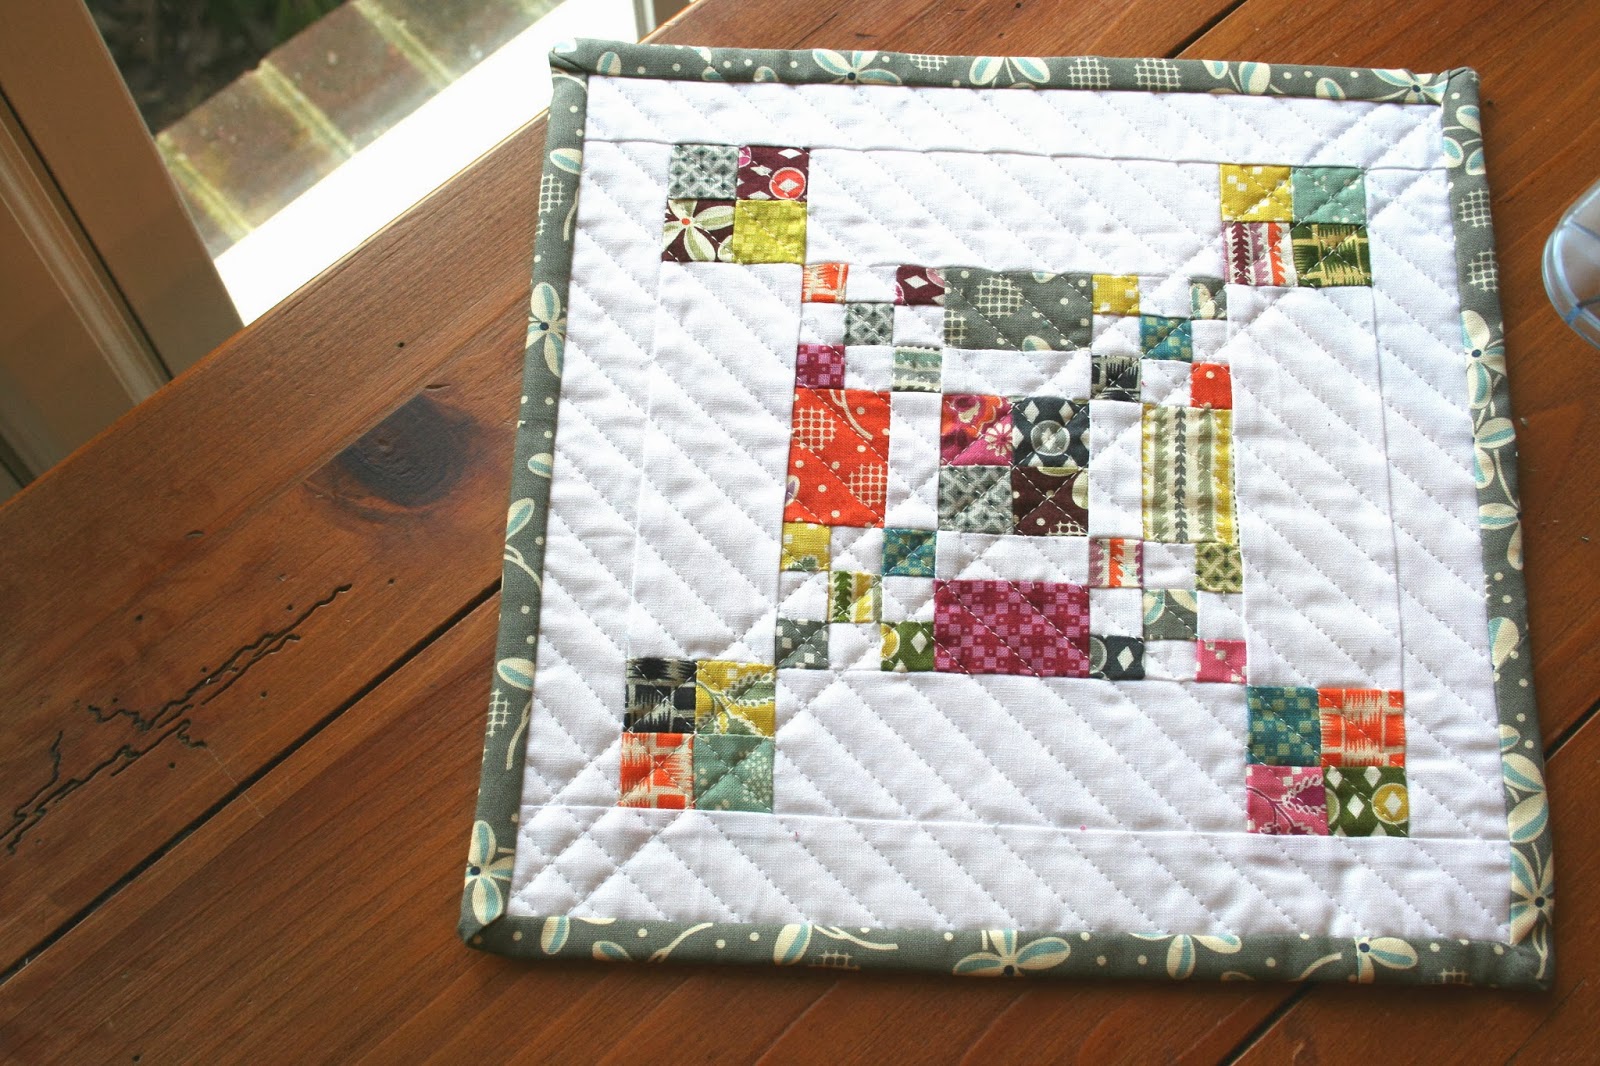
To make the mini you can use a favorite fabric line { I used Denyse Schmidt Hope Valley} or it is a great stash buster. It does not require a lot of fabric and can be finished in a matter of hours. If you are looking for a nice quick sewing finish, this is a wonderful project. Minis are also fantastic for trying new techniques without committing to an entire quilt. This sized quilt can be hung on a wall or used as a favorite mug rug for your tea or coffee and biscuits.
The finished size of this mini is 10 inches square All the seams are 1/4in
The fabric requirements are as follows:
20 1.25 in print fabric
20 1.00 in print fabric
16 1.00 in solid fabric
4 1x2 in pieces solid fabric
4 1.5x 2 in pieces print fabric
4 2x6.5 inch pieces solid fabric
2 2x11 inch pieces solid fabric
2 2x8 inch pieces solid fabric
Binding and backing are your choice
Take your fabric pieces and place them in the design you would like. I tried to make mine as random as possible.
Start by sewing the 1.25 inch print squares into groups of four which makes the center block. To do this, line the wrong sides of two pieces together and sew. Take two more squares and repeat. When you have these two completed, line the two sets up, wrong sides facing, making sure that the centers line up and sew. Repeat this process until you have the four sets. Set these to one side.
Next are your nine square blocks
{tip} I found that it was much easier to manage the smaller pieces to have one long solid strip and chain stitch the squares. You should do what you are more comfortable with. This helped me to have straighter stitching :o)
I sewed the other side by just lining up and going but you can pin to make sure they stay put
Sew the nine square together using the 1 inch solid squares and the 1 inch print squares using this pattern:
Print, solid, print
solid, print, solid
print, solid, print
When the rows have been completed, connect them together from top to middle section, then middle to bottom.
When the nine squares have been sewn together move on to the next step, sewing the side pieces using the 1x2 solid pieces and the 1.5x 2 print. Simply sew these together.
Now you are ready to assemble the quilt!
Sew the rows together from top to middle, then middle to bottom.
To finish off the mini quilt top, add the sashing to the sides, top and bottom of the quilt using the 2x8 solids for the sides and the 2x10 solids for the top and bottom.
I chose to back mine in Robert Kaufman Kona Gray with a bit of the Hope Valley in the middle.
The quilting was simple lines in Aurifil 50wt. The quilt is very small and I thought the straight lines would be the best. The binding is also Hope Valley and my first hand bound quilt.
If you have any questions about this tutorial, I would love to hear from you! Please send me an email at mygogolife@yahoo.com
If you make this project I would be OVER THE MOON to see it! Please post it in my Flickr Group
Linked on


15 comments
Fabulous quilt!
Hope Valley is one of my all time favourites too!!
So pretty!!
Thanks for the tutorial! I have the perfect scraps for this one!
What a wonderful design! I hope you will get a copy of the magazine!
Esther
so very nice of you to share that. Too bad about the mag going bust. I am going to bookmark it and save for some day soon!
Wow - what a lovely (and impressive) mini!!
This is darling! I am not into itty bitty, pieces, but I could see myself using your design with larger squares. Thanks for sharing.
It is charming, the little pieces are great!
Super cute, I love it! I hope you get a copy of the magazine.
Very cute! Sorry the original vanished though :o(
So tiny! It's a perfect project for those tiny pieces that I just can't throw away!
Love Hope Valley! this is an adorable little quilt!
Gorgeous malorgeous
Thanks for sharing this little beauty!
Wow. That is amazing and in such tiny pieces. It's gorgeous. I'm very tempted to try this. I wonder if I'll be able to with all my fingertips intact with such small pieces. LOL I do really love this and the look you've created. Very nice. Thank you.
Post a Comment